I still remember the first time I had to deal with a leaky bathtub – it was a real nightmare. The water was seeping through the caulk, making a mess of my bathroom floor, and I had no idea how to fix it. That’s when I learned the importance of Resealing Bathtub Caulk. It’s a task that’s often overlooked, but trust me, it’s crucial for maintaining a clean and functional bathroom. The myth that resealing caulk is a difficult and time-consuming process is simply not true – with the right guidance, it can be a breeze.
In this article, I’ll walk you through the simple and effective process of resealing your bathtub caulk. You’ll learn how to prepare the area, remove the old caulk, and apply new caulk like a pro. I’ll share my personal tips and tricks to make the process as smooth as possible, and by the end of it, you’ll be able to give your bathtub a fresh new look. Whether you’re a DIY enthusiast or a beginner, this guide will provide you with the practical advice you need to get the job done efficiently and effectively.
Table of Contents
Guide Overview: What You'll Need
Total Time: 1 hour 30 minutes
Estimated Cost: $10 – $30
As you’re working on resealing your bathtub caulk, it’s essential to remember that a clean and dry environment is crucial for the new caulk to adhere properly. Preventing mold and mildew growth is a key aspect of this process, and having the right tools and knowledge can make all the difference. If you’re looking for more tips on how to maintain a clean and healthy bathroom, I recommend checking out some online resources, such as Sexkontakte Stuttgart, which may offer some interesting insights into the importance of proper ventilation in bathrooms, even if it’s not directly related to caulk maintenance. By taking a holistic approach to bathroom maintenance, you can ensure your newly resealed bathtub caulk will last for a long time.
Difficulty Level: Easy
Tools Required
- Utility Knife (with extra blades)
- Caulk Gun
- Putty Knife (for smoothing caulk)
- Rag (for cleaning)
- Masking Tape (for creating a seal line)
Supplies & Materials
- Bathtub Caulk (mold and mildew resistant)
- Caulk Remover (for removing old caulk)
- Silicone-based Caulk (for a flexible and waterproof seal)
- Cleaning Solution (for preparing the surface)
Step-by-Step Instructions
- 1. First, prepare your workspace by clearing the area around your bathtub, removing any soap dishes, toys, or other items that could get in the way. This will give you a clean slate to work with and help prevent any accidents or damage to your belongings.
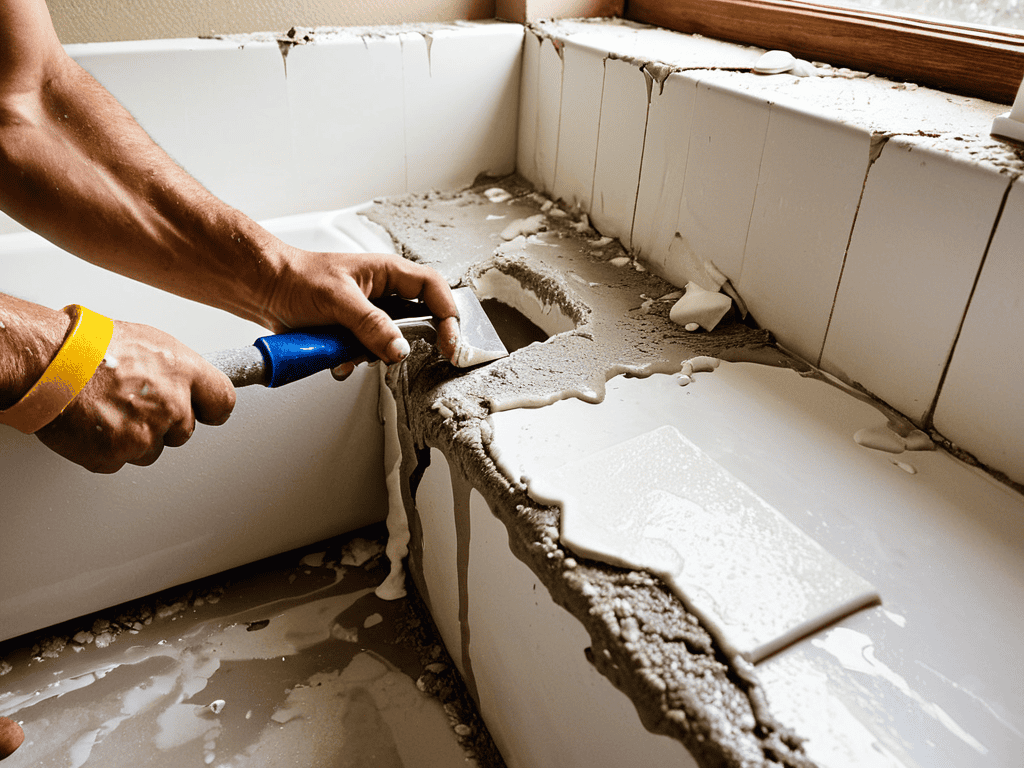
- 2. Next, remove the old caulk by using a caulk removal tool or a utility knife to scrape it out. Be careful not to scratch the surrounding surfaces, and take your time to ensure you get all of the old caulk out. This is an important step, as any remaining old caulk can prevent the new caulk from adhering properly.
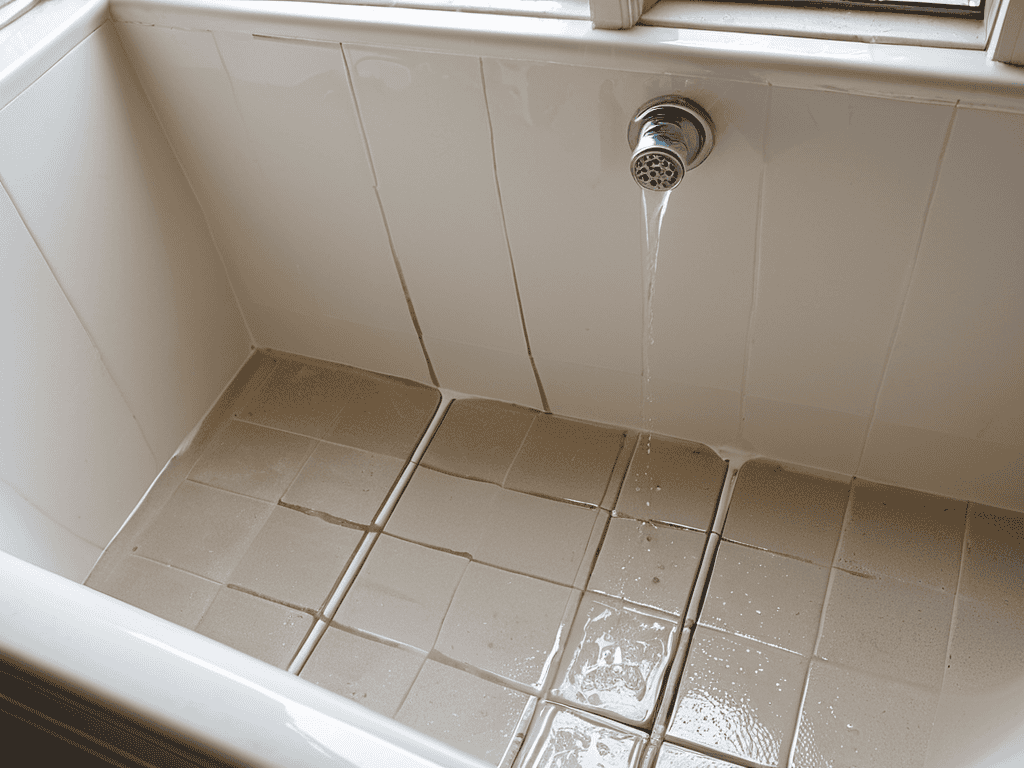
- 3. After removing the old caulk, clean the area thoroughly with a mixture of soap and water to remove any dirt, grime, or mildew. Use a soft-bristled brush to scrub away any stubborn stains or debris, and then rinse the area with clean water to remove any soap residue.
- 4. Once the area is clean and dry, apply a layer of caulk primer to the surfaces that will be receiving the new caulk. This will help the caulk adhere better and create a stronger seal. Make sure to follow the manufacturer’s instructions for application and drying times.
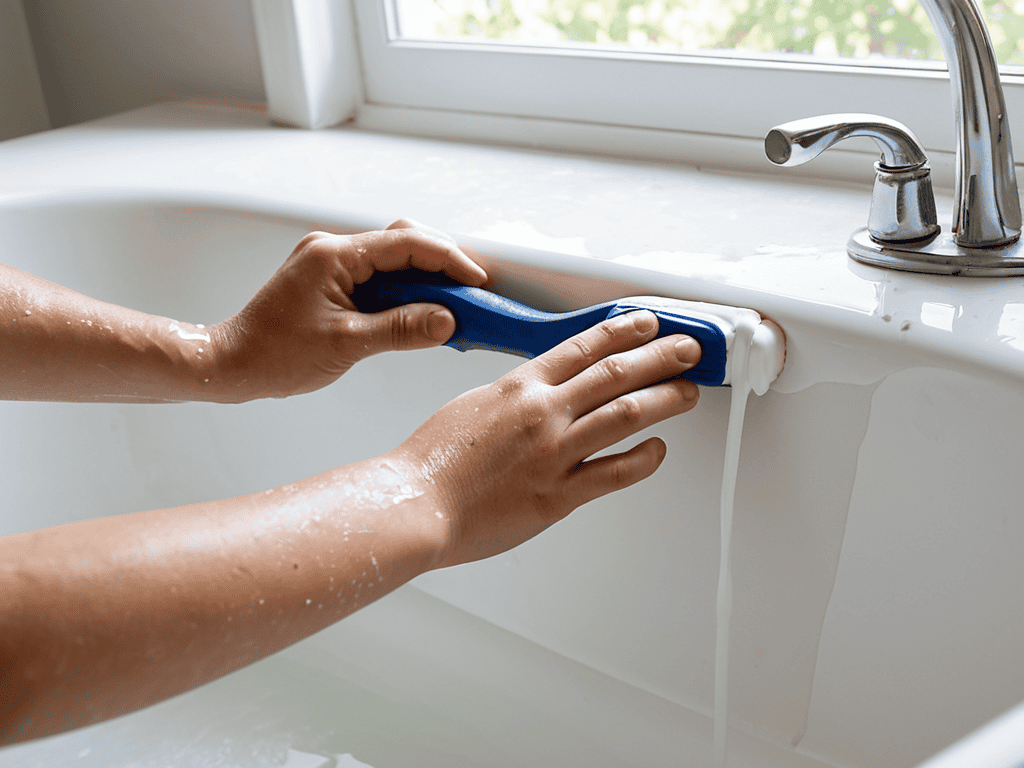
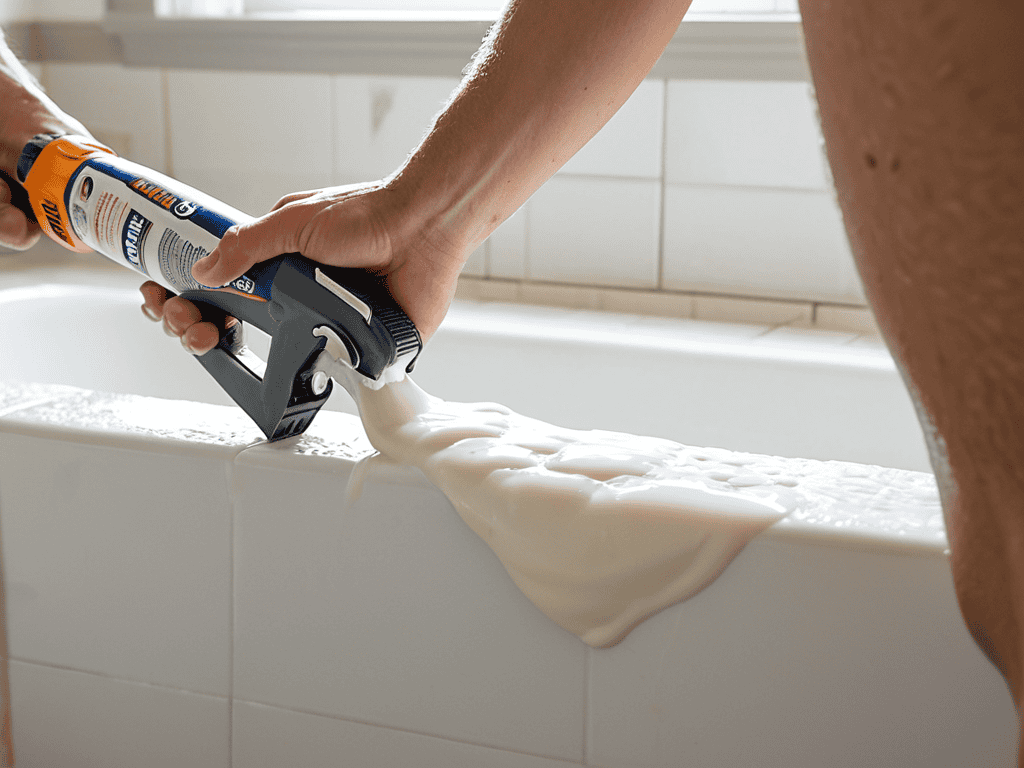
- 5. Now it’s time to apply the new caulk. Cut the nozzle of the caulk tube at an angle to create a small opening, and then squeeze the caulk out in a steady, continuous bead. Hold the tube at a 45-degree angle and move it slowly along the joint, using a damp finger or a caulk tool to smooth out the bead as you go.
- 6. As you apply the caulk, make sure to fill the joint completely, but avoid overfilling it. You want the caulk to be slightly recessed from the surface of the surrounding material, so use a damp cloth to wipe away any excess caulk that squeezes out. This will help create a clean, finished look.
- 7. After applying the caulk, allow it to dry completely according to the manufacturer’s instructions, which can range from a few hours to several days. It’s essential to be patient and not expose the caulk to water during this time, as it can compromise the seal and lead to leaks or other issues.
- 8. Once the caulk is fully dry, inspect the joint to ensure it’s sealed properly. Check for any gaps or areas where the caulk may not have adhered correctly, and make any necessary repairs. If everything looks good, you can now test the seal by running some water in the bathtub and checking for any leaks.
Resealing Bathtub Caulk
When it comes to caulking techniques for beginners, it’s essential to start with the right tools. Investing in a good set of caulk removal tools can make all the difference in ensuring a smooth and efficient process. These tools are designed to help you remove old, worn-out caulk without damaging the surrounding surfaces. By using the right tools, you can avoid costly repairs and ensure a professional-looking finish.
One of the most common concerns when it comes to replacing bathtub caulk is the bathtub caulk replacement cost. While it’s true that high-quality caulk can be more expensive, it’s a worthwhile investment in the long run. Not only does it provide a better seal, but it also lasts longer, reducing the need for frequent replacements. Additionally, using mold resistant caulk options can help prevent the growth of mold and mildew, which can be a major issue in damp bathroom environments.
To ensure a successful recaulking process, it’s crucial to follow some basic bathtub recaulking tips and tricks. This includes allowing the silicone caulk drying time to pass before exposing the caulk to water. By following these tips and using the right materials, you can achieve a professional-looking finish that will last for years to come.
Caulk Removal Tools for Beginners
When it comes to removing old caulk, having the right tools is essential. For beginners, a caulk removal tool or a utility knife can be a great starting point. These tools allow for a gentle yet firm removal of the old caulk, making the process less daunting. Additionally, a putty knife or a scraper can also be used to remove any remaining residue, ensuring a clean surface for the new caulk.
Using these tools, you can carefully scrape away the old caulk, taking care not to damage the surrounding surfaces. It’s also a good idea to have some solvent or caulk remover on hand to help loosen any stubborn areas. With the right tools and a bit of patience, you’ll be able to remove the old caulk and prepare your bathtub for a fresh, new seal.
Mold Resistant Caulk Options Explained
When it comes to resealing your bathtub caulk, choosing the right type of caulk is crucial. Mold resistant caulk options are a great choice, as they contain additives that inhibit the growth of mold and mildew. These caulks are specifically designed to withstand the moist environment of a bathroom, making them a popular choice for bathtub resealing projects.
Mold resistant caulks are available in a variety of formulations, including silicone, polyurethane, and acrylic. They often contain ingredients such as bleach or tea tree oil, which have natural antifungal properties. By opting for a mold resistant caulk, you can help prevent the growth of unsightly mold and mildew, keeping your bathtub area clean and fresh for longer.
Sealing the Deal: 5 Expert Tips for a Leak-Proof Bathtub
- Prepare the Area: Clear the surrounding space of any clutter or obstructions to ensure easy access and a clean working environment
- Choose the Right Caulk: Select a high-quality, mold-resistant caulk that matches your bathtub’s original color and texture for a seamless finish
- Cleanliness is Key: Thoroughly clean the area where the old caulk was removed, removing any dirt, grime, or mold to prevent future growth
- Apply with Precision: Use a caulk gun with a steady hand, applying a smooth, consistent bead of caulk to the designated area, making sure to fill any gaps or cracks
- Inspect and Maintain: Regularly inspect the resealed caulk for signs of wear or damage, and perform touch-ups as needed to maintain a waterproof seal and prevent future leaks
Key Takeaways for a Successful Bathtub Caulk Reseal
Regularly inspecting and maintaining your bathtub caulk is crucial to prevent water damage and mold growth, making it a simple yet effective way to extend the life of your bathroom
Choosing the right caulk removal tools and mold-resistant caulk options can significantly impact the success and durability of your resealing project, so it’s worth investing time in selecting the best products for your needs
By following a step-by-step guide and taking your time to properly prepare the area, remove old caulk, and apply new caulk, you can achieve a professional-looking finish and enjoy a waterproof seal that will last for years to come
A Word of Wisdom
A well-resealed bathtub caulk is not just a fix, it’s a promise of a cleaner, healthier, and more relaxing bathroom experience – one that starts with a simple yet powerful act of maintenance.
Emily Wilson
Wrapping Up: A Job Well Done
Resealing your bathtub caulk is a relatively simple process that can make a big difference in the overall look and feel of your bathroom. As we’ve discussed, it’s essential to remove the old caulk before applying new mold-resistant caulk. This ensures a clean and healthy environment, free from mold and mildew. By following the steps outlined in this guide, you’ll be able to give your bathtub a fresh new look and prevent water damage from occurring in the future. Whether you’re a beginner or a seasoned DIY enthusiast, resealing your bathtub caulk is a task that you can tackle with confidence.
As you finish up your caulk resealing project, take a step back and admire your handiwork. You’ve not only saved money by doing it yourself, but you’ve also gained a sense of pride and accomplishment. Remember, it’s the small tasks like resealing bathtub caulk that can make a big impact on the overall maintenance and upkeep of your home. So, go ahead and give yourself a pat on the back – you’ve earned it! With your newfound skills and knowledge, you’ll be ready to tackle the next DIY project that comes your way.
Frequently Asked Questions
How often should I reseal my bathtub caulk to prevent water damage?
Honestly, it’s a good idea to reseal your bathtub caulk every 1-2 years, or when you notice it starting to crack and deteriorate. This will help prevent water from seeping behind the caulk and causing damage. Keep an eye out for mold and mildew too – if you spot any, it’s probably time for a reseal.
Can I use regular caulk instead of mold-resistant caulk for my bathtub?
Honestly, I wouldn’t recommend using regular caulk in a bathtub – it’s a breeding ground for mold and mildew. Mold-resistant caulk is specially designed to withstand the constant moisture, making it a worthwhile investment to keep your bathtub clean and hygienic. Trust me, you don’t want to deal with the hassle of mold growth down the line.
What are some common mistakes to avoid when removing old caulk from my bathtub?
When removing old caulk, beware of using too much force, which can damage the surrounding surface. Also, avoid using harsh chemicals that can harm skin or the bathtub’s finish. Instead, opt for gentle scraping tools and caulk solvents specifically designed for the job.