Imagine me, elbows tucked into the kitchen counter, a half‑opened faucet ticking like a lazy metronome while I wrestle with a tangle of PVC elbows and a salvaged rain‑barrel. I’d just read another glossy blog that promised a plug‑and‑play DIY greywater recycling system you could snap together in five minutes, only to find the guide assumed I owned a PhD in plumbing. That myth—that you can buy a kit, flip a switch, and instantly turn shower runoff into garden gold—has been my pet peeve ever since my grandfather showed me his hand‑wired thermostat from 1978. In that moment the water’s steady rhythm reminded me that technology, even something as humble as reclaimed water, is less about magic shortcuts and more about simple physics that make a drip useful.
In the pages that follow I’ll strip away the hype and give you a step‑by‑step, no‑fluff guide to building a functional DIY greywater recycling system with garage‑found parts, a cheap flow sensor, and a splash of code for monitoring. You’ll walk away with a working loop, a clear view of local code basics, and a rebellion against our throwaway tech culture.
Table of Contents
Guide Overview
Tools & Supplies
- Pipe cutter – for cleanly trimming PVC pipe
- Drill with hole‑saw bits – to create inlet/outlet holes in tank
- Adjustable wrench – for tightening fittings
- Screwdriver set – for assembling brackets and clamps
- PVC primer and cement – to securely join pipe sections
- Level – to ensure tank sits evenly
- Measuring tape – for accurate pipe lengths
- 20‑gallon food‑grade barrel (1) – primary greywater storage
- 1‑inch PVC pipe (10 ft) – main conveyance line
- 1‑inch PVC elbows and tees (4 each) – routing connections
- PVC cement and primer (1 bottle each) – sealing joints
- Fine mesh screen (1 sq ft) – pre‑filter for debris
- Hose clamps (4) – securing hoses to fittings
- Teflon tape (1 roll) – sealing threaded connections
- Silicone sealant (1 tube) – waterproofing tank openings
- Quick‑connect hose adapters (2) – for easy maintenance access
Step-by-Step Instructions
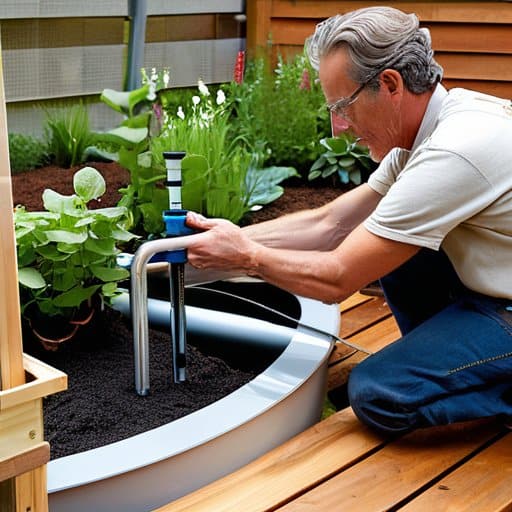
- 1. Start with a mindset shift – before I even uncorked a wrench, I asked myself: What story do I want my water to tell? Grab a sturdy 2‑inch PVC pipe, a simple T‑connector, and a bucket with a lid. First, cut the pipe to a length that will let you route water from your shower drain to the bucket without a kink. Slip the T‑connector onto the pipe so one branch points toward the drain and the other toward your bucket. This modest hardware becomes the stage where greywater meets repurposing.
- 2. Create a gentle filtration net – I like to think of this as the “screening room” for my water’s first act. Cut a piece of fine mesh (a window screen works surprisingly well) slightly larger than the pipe’s diameter. Secure it over the bucket’s opening with a rubber band, then drape a piece of clean, breathable fabric (like muslin) over the mesh. This double‑layered filter catches hair, soap scum, and any rogue beads of shampoo, letting only the clean flow pass through.
- 3. Install a low‑tech diverter valve – Here’s where the narrative gets a choice point: Do I let the water go straight to the garden, or keep it for later? Mount a simple ball valve on the pipe leading to the bucket. When you’re ready to divert water, flip the valve open; when you prefer to keep the system idle, close it. This gives you control over the flow and turns the whole setup into an interactive performance.
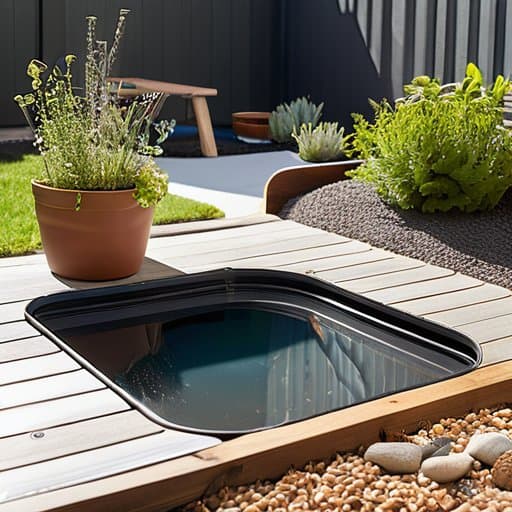
- 4. Set up a gravity‑driven outlet – I’m a fan of letting physics do the heavy lifting. Position the bucket on a modest riser (a stack of cinder blocks works fine) so that the water can flow downhill into a garden hose or a drip‑irrigation line. Connect a short length of garden hose to the bucket’s drain valve, run it to your planting zone, and secure it with zip ties. The water will now travel by gravity, delivering “shower leftovers” directly to thirsty roots.
- 5. Prime the system with a test run – Before you crown this DIY masterpiece, it’s worth a rehearsal. Turn on the shower (cold water first, just to avoid steam) and watch the water cascade through your pipe, filter, and into the bucket. Check for leaks at every joint, ensure the mesh stays snug, and verify that the hose delivers a steady, gentle stream to your plants. If anything drips, tighten the connections and repeat the test—think of it as a dress rehearsal.
- 6. Maintain with a philosopher’s patience – Like any good narrative, this system needs regular editing. Every week, empty the bucket, rinse the mesh, and give the PVC pipe a quick wipe‑down. If you notice a buildup of residue, replace the fabric filter. This routine keeps the water clean and your garden thriving, and it reminds us that even the simplest tech projects require a habit of mindful upkeep.
Choosing Home Greywater Filtration Methods for Fresh Flow
When you start thinking about home greywater filtration methods, remember that the simplest setups often outperform fancy add‑ons. A layered sand‑and‑gravel cartridge can be built for under $30, yet it strips out hair, soap scum, and fine particles before the water reaches your garden beds. If you’re wrestling with the choice between rainwater vs greywater reuse, keep in mind that greywater carries a modest nutrient boost—think nitrogen and phosphorus—that rainwater lacks, making it a quieter champion for low‑maintenance lawns. Before you order any parts, double‑check the building code for residential greywater in your municipality; many cities require a back‑flow preventer or a specific pipe diameter, and a quick phone call to the local planning office can save you a costly redesign later.
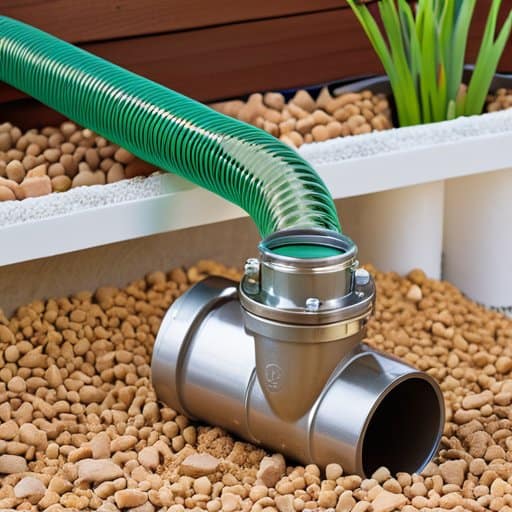
Once the filtration stage is sorted, the next puzzle piece is the plumbing layout for greywater system. Running a dedicated line from your washing machine or shower to a low‑pressure drip‑irrigation loop will keep pressure drops minimal and prevent unwanted siphoning. For those on a shoestring budget, consider a low-cost greywater pump options such as a repurposed sump‑pump with a simple pressure switch—just be sure the motor is rated for continuous duty. Finally, embed maintenance tips for greywater recycling into your routine: flush the filter media every 2–3 months, inspect the pump’s impeller for debris, and log the flow rate so you can spot a gradual drop before it becomes a full‑blown failure. This habit turns what could be a hidden chore into a quick, almost meditative check‑in with your garden’s new water source.
Low Cost Greywater Pump Options Powering Your Garden Oasis
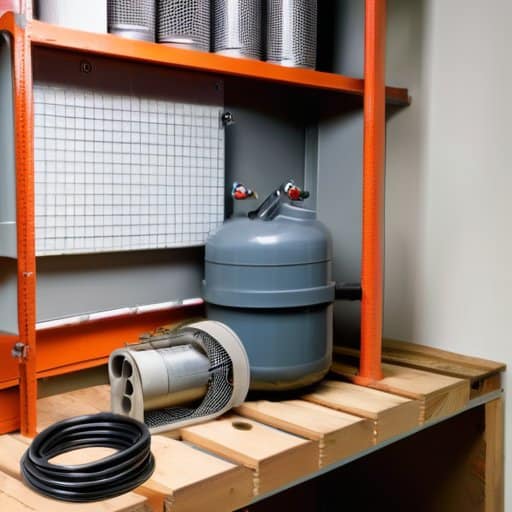
When I first scoured the garage for a pump, I was surprised how many low-cost greywater pump options sit on a DIY‑enthusiast’s shelf. A compact, 1/3‑hp submersible utility pump—often under $80—handles occasional debris and fits neatly beside a simple home greywater filtration methods stage (a mesh screen and charcoal cartridge do the trick). Sketch your plumbing layout for greywater on graph paper first; placing the pump near the collection tank cuts head loss, and a short ½‑inch PVC run keeps the electrical load modest.
The pump is only half the story; the real payoff arrives when you pair it with sustainable irrigation using greywater techniques. I’ve routed a low‑pressure drip line to a raised vegetable bed, letting a pressure‑sensing valve prevent surges. Before you commit, check the building code for residential greywater in your area—some jurisdictions treat greywater like rainwater, while others demand a back‑flow preventer. A quick audit of maintenance tips for greywater recycling—flushing the pump weekly and cleaning the filter housing—keeps the loop humming quietly, proving that a modest budget can still yield a tech‑savvy garden oasis. And as the soil drinks, you’ll hear the quiet hum of progress.
Five Insider Hacks for a Greener Greywater Flow
- Map out your household’s hot‑water lines first—knowing where to tap saves both time and extra elbows.
- DIY a sand‑and‑charcoal filter; it’s cheap, effective, and gives you a tactile reminder of water’s journey.
- Match pump wattage to your garden’s elevation—over‑powering a pump wastes energy, under‑powering leaves the beds thirsty.
- Keep a simple test strip kit on hand; a quick pH and chlorine check can catch issues before they become costly.
- Schedule a monthly “flush‑and‑scrub” routine to clear debris and keep your system humming like a well‑tuned server.
DIY Greywater Takeaways
A gravity‑driven or affordable pump system can transform everyday runoff into garden nourishment with minimal expense.
Selecting the right filtration—simple mesh screens or a DIY sand‑gravel filter—keeps both plants thriving and your home plumbing safe.
Consistent upkeep, like clearing clogs and monitoring water quality, guarantees a reliable, sustainable loop for years ahead.
Turning Waste into Wisdom
“When we reroute a bathroom’s sigh into a garden’s breath, we’re not just conserving water—we’re scripting a quiet rebellion where everyday tech rewrites the story of scarcity.”
William Daby
Wrapping It All Up
When I was piecing together the final layout for my own backyard loop, I stumbled across a surprisingly generous online hub where DIY enthusiasts actually upload their full schematics, bill‑of‑materials lists, and even a few video walk‑throughs that saved me hours of trial‑and‑error; you can explore the treasure trove of community‑tested plans at free sex glasgow, where members habitually tag their uploads with “#GreywaterDIY” so you can filter for exactly what you need, and the comment threads often include tips on sourcing cheap pump alternatives that fit snugly into tight basements—the kind of grassroots knowledge that turns a daunting project into a weekend adventure.
Looking back over the steps we just walked through—capturing runoff, installing a simple diverter, choosing a filter that suits your garden’s temperament, and wiring a low‑cost pump—you’ve assembled more than a pipe network. You’ve built a miniature example of how everyday hardware can rewrite the story of water in a suburban backyard. By matching the right filtration method to your soil’s needs and pairing it with a modest pump, the system stays efficient without demanding a master’s degree in hydraulics. In short, a functional DIY greywater system can be set up in a weekend, turning what was once waste into a thriving, reclaimed resource. Since the components are sourced locally, the project stays friendly to both your wallet and the planet.
Beyond the garden, the act of diverting a few gallons of gray water each day invites a subtle shift in how we view the flow of resources in a digitized world. When a simple Arduino‑controlled valve can decide whether a shower’s excess ends up on a flowerbed or the sewer, we glimpse a future where code, circuitry, and conscience co‑write the rules of consumption. So I invite you to keep tinkering—experiment with sensors, log your water savings, and share the data with neighbors. In doing so, we turn a modest backyard project into a seed for a broader, more future‑proof culture of stewardship.
Frequently Asked Questions
How can I ensure my DIY greywater system complies with local building codes and health regulations?
First, I pull the local building‑code handbook—most counties post PDFs on their planning‑department site. Then I call the permitting office, describe my gray‑water loop, and ask about required setbacks, approved fittings, and back‑flow‑prevention devices. A quick chat with a licensed plumber or certified rain‑water installer confirms I’m on the right track. Finally, I log every inspection, test the effluent for pH and turbidity, and file the paperwork so the city knows I’m compliant.
What are the most effective, low‑maintenance filtration materials for keeping garden‑ready water clear without breaking the bank?
If you’re after a “set‑and‑forget” filter that keeps your garden water crystal‑clear without draining your wallet, I’ve found three humble heroes work like a charm. First, a simple sand‑and‑gravel bed (½‑inch river sand over a 1‑inch gravel base) acts as a gravity‑driven pre‑filter—no electricity, just gravity. Second, a sheet of fine‑mesh (½‑mm nylon) tucked into the inlet traps hair‑sized debris while staying rust‑proof. Finally, a handful of activated charcoal pellets in a small, removable cartridge mops up residual organics and odors, and you can swap it out for pennies every few months. Combine these layers, let the water settle a few minutes, and you’ve got garden‑ready clarity without a maintenance nightmare.
Can I integrate a solar‑powered pump into my greywater setup, and if so, what size panel and battery capacity do I actually need?
Absolutely—you can power a grey‑water pump with a modest solar kit. For a typical ½‑hp (≈400 W) pump that runs a few hours a day, a 100‑W monocrystalline panel (or two 50‑W panels if you have limited roof space) will harvest enough juice in bright sun. Pair it with a 12 V, 40‑Ah deep‑cycle battery (or a 12 V, 80‑Ah if you want a safety margin for cloudy days) and a simple MPPT charge controller. A small solar‑pump combo like this keeps your garden hydrated while staying off the grid.